Flutter · Razorpay · Payments · FastAPI · Dart
Razorpay in Flutter: orders, checkout, signature verification and webhooks
Add Razorpay to a Flutter app the safe way: create the order on your server, open Checkout, verify the signature server-side and confirm with webhooks.
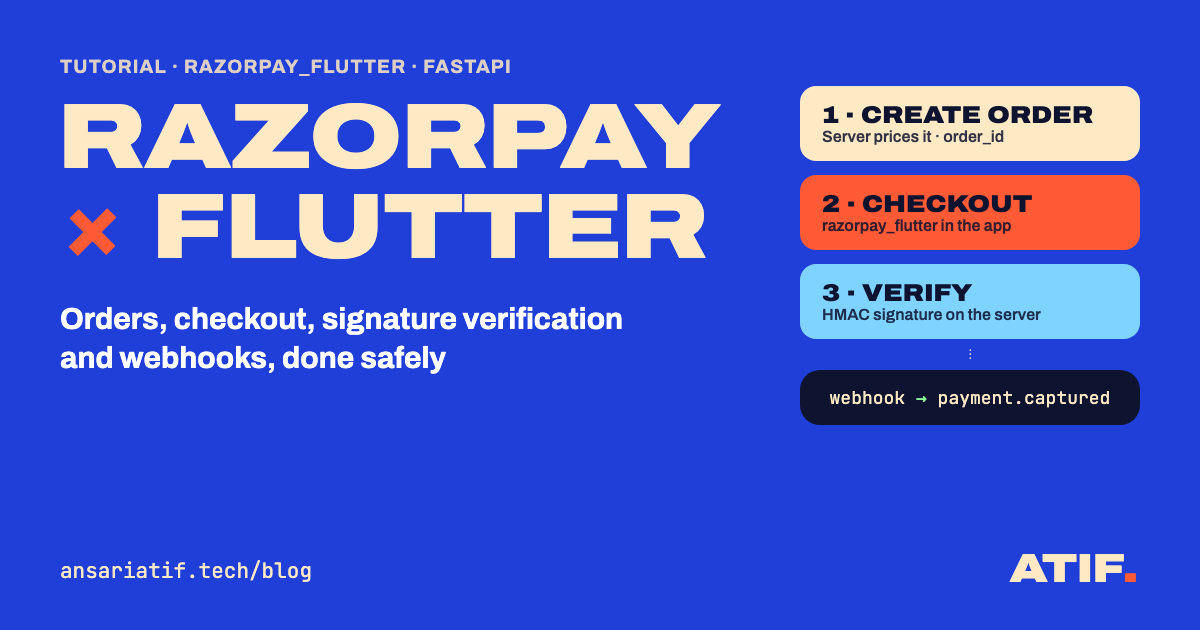
To integrate Razorpay in Flutter, create the order on your server, open Razorpay Checkout in the app with that order ID, then send the payment ID, order ID and signature back to your server and verify the signature with your key secret before you mark the order paid. Add a payment.captured webhook as a backup, so orders still update when the user closes the app mid-payment.
This tutorial builds that flow end to end: a small FastAPI backend and a Flutter screen that pays for an order. The same steps apply if your backend is Laravel, Node.js or Serverpod; only the server syntax changes.
Why the server has to be involved
The Razorpay Checkout opens inside your app, so it's tempting to do everything there. Don't. Three things must happen on a server you control:
- Creating the order. The amount has to come from your database, not from the app. Otherwise anyone can change the price in a modified build.
- Verifying the signature. Verification uses your key secret, and a secret shipped inside an app is not a secret.
- Receiving webhooks. Razorpay calls a public URL when a payment is captured, even if the phone has lost its connection.
The app only ever sees your key ID, which is public by design.
The flow at a glance
- The app asks your server to create an order for a cart or a plan.
- The server calls the Razorpay Orders API with the amount in paise and returns the
order_id. - The app opens Razorpay Checkout with the key ID and
order_id. - On success, Checkout returns
razorpay_payment_id,razorpay_order_idandrazorpay_signature. - The app sends those three values to your server, which verifies the signature and marks the order paid.
- Razorpay also sends a webhook (
payment.capturedororder.paid), which your server verifies and handles idempotently.
Step 1: create the order on the server
Install the Razorpay Python SDK and keep your keys in environment variables. Use test keys (rzp_test_…) until everything works.
pip install fastapi uvicorn razorpayimport os
import razorpay
from fastapi import FastAPI, HTTPException
from pydantic import BaseModel
client = razorpay.Client(auth=(os.environ["RAZORPAY_KEY_ID"], os.environ["RAZORPAY_KEY_SECRET"]))
app = FastAPI()
class CreateOrder(BaseModel):
cart_id: str
@app.post("/orders")
def create_order(body: CreateOrder):
amount_paise = price_for_cart(body.cart_id) # read the price from YOUR database
order = client.order.create({
"amount": amount_paise, # ₹499.00 is 49900 paise
"currency": "INR",
"receipt": body.cart_id,
"notes": {"cart_id": body.cart_id},
})
save_pending_order(body.cart_id, order["id"], amount_paise)
return {"order_id": order["id"], "amount": amount_paise, "key_id": os.environ["RAZORPAY_KEY_ID"]}Amounts are always in the smallest currency unit, so rupees are sent as paise. Saving the pending order with Razorpay's order_id is what lets you match the payment and the webhook later.
Step 2: open Checkout in Flutter
Add the official plugin with flutter pub add razorpay_flutter, and check its README for the current minimum Android and iOS versions.
import 'package:flutter/material.dart';
import 'package:razorpay_flutter/razorpay_flutter.dart';
class PayButton extends StatefulWidget {
const PayButton({super.key, required this.cartId});
final String cartId;
State<PayButton> createState() => _PayButtonState();
}
class _PayButtonState extends State<PayButton> {
final _razorpay = Razorpay();
void initState() {
super.initState();
_razorpay.on(Razorpay.EVENT_PAYMENT_SUCCESS, _onSuccess);
_razorpay.on(Razorpay.EVENT_PAYMENT_ERROR, _onError);
_razorpay.on(Razorpay.EVENT_EXTERNAL_WALLET, _onWallet);
}
void dispose() {
_razorpay.clear(); // removes the listeners
super.dispose();
}
Future<void> _pay() async {
final order = await api.createOrder(widget.cartId); // POST /orders
_razorpay.open({
'key': order.keyId,
'order_id': order.orderId,
'amount': order.amount,
'currency': 'INR',
'name': 'Your business name',
'description': 'Order ${widget.cartId}',
'prefill': {'contact': user.phone, 'email': user.email},
});
}
Future<void> _onSuccess(PaymentSuccessResponse r) async {
// Not paid yet: the server decides.
await api.verifyPayment(
orderId: r.orderId!,
paymentId: r.paymentId!,
signature: r.signature!,
);
}
void _onError(PaymentFailureResponse r) {
// r.code and r.message: user cancelled, network error, bank declined…
}
void _onWallet(ExternalWalletResponse r) {
// The user picked an external wallet such as r.walletName.
}
Widget build(BuildContext context) =>
FilledButton(onPressed: _pay, child: const Text('Pay now'));
}api and user stand in for your own API client and signed-in user. Two details matter here:
EVENT_PAYMENT_SUCCESSmeans Checkout finished, not that you've been paid. Treat it as "please verify".- Always call
clear()indispose(), or a second screen can receive events meant for the first.
Step 3: verify the signature on the server
Razorpay signs order_id + "|" + payment_id with HMAC-SHA256 using your key secret. The SDK checks it for you:
from razorpay.errors import SignatureVerificationError

class VerifyPayment(BaseModel):
    razorpay_order_id: str
    razorpay_payment_id: str
    razorpay_signature: str

@app.post("/payments/verify")
def verify_payment(body: VerifyPayment):
    try:
        client.utility.verify_payment_signature(body.model_dump())
    except SignatureVerificationError:
        raise HTTPException(status_code=400, detail="Invalid payment signature")
    mark_order_paid(body.razorpay_order_id, body.razorpay_payment_id)  # idempotent
    return {"status": "paid"}
Only after this check passes should the app show the success screen and your system ship the order.
Step 4: confirm with a webhook
The app can die between Checkout and your verify call: a dead battery, a killed process, a lost network. The webhook is how the order still gets marked paid.
In the Razorpay Dashboard, add a webhook pointing at https://your-api.example/webhooks/razorpay, choose a webhook secret, and subscribe to payment.captured, payment.failed and order.paid.
from fastapi import Request

@app.post("/webhooks/razorpay")
async def razorpay_webhook(request: Request):
    raw = (await request.body()).decode()  # verify the RAW body, before parsing
    signature = request.headers.get("X-Razorpay-Signature", "")
    try:
        client.utility.verify_webhook_signature(raw, signature, os.environ["RAZORPAY_WEBHOOK_SECRET"])
    except SignatureVerificationError:
        raise HTTPException(status_code=400)

    event = await request.json()
    if event["event"] == "payment.captured":
        payment = event["payload"]["payment"]["entity"]
        mark_order_paid(payment["order_id"], payment["id"])  # same idempotent function
    return {"ok": True}
mark_order_paid must be idempotent: the verify call and the webhook will usually both arrive, and Razorpay retries webhooks that don't get a 2xx response. Store the payment ID with a unique constraint and ignore duplicates.
Authorized vs captured
A payment is authorized when the bank approves it, and captured when the money is actually settled to you. If a payment stays authorized and is never captured, Razorpay refunds it to the customer automatically after a few days.
For most apps, turn on automatic capture in the Dashboard's payment capture settings. Capture manually only when you need to confirm stock or a booking first, and then capture through the Payments API once you have.
Testing checklist
- Use test-mode keys, and the test cards and UPI IDs from Razorpay's documentation.
- Pay successfully, then check that your database shows the order as paid exactly once.
- Cancel Checkout and check that the order stays pending.
- Kill the app right after paying and check that the webhook still marks the order paid.
- Send a webhook with a wrong signature and check that it's rejected with a 400.
- Switch to live keys only after all of the above pass, and register a separate live-mode webhook.
Common mistakes
- Sending the amount from the app. Always price the order on the server.
- Putting the key secret in the Flutter app. Only the key ID belongs there.
- Trusting
EVENT_PAYMENT_SUCCESS. Verify the signature on the server first. - Verifying a parsed and re-serialised webhook body. The signature is over the raw bytes.
- Not handling duplicates. Webhooks retry; the app may also call verify twice.
If you'd rather have this built and tested for you, I do payment gateway integration for websites and Flutter apps, including the backend and webhooks.